NG 900/9-3 Heater/Blower Fan Diagnostic Procedure
Diagnostic Procedure
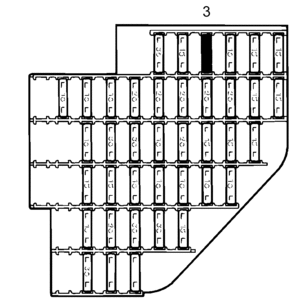
1. Check fuse 3 and that it is live.
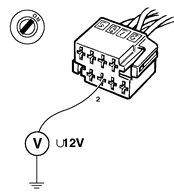
2. Unplug the 8-pin connector from the rear of the control panel and check whether pin 2 of the connector is live.
3. Check the wiring between pin 2 of the control panel and fuse 3 for continuity/shorting.
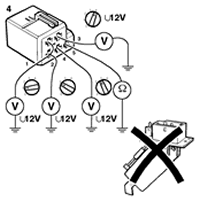
4. Unplug the fan's connector and check the voltage as shown below:
- Fan speed 1 should give a reading of 12 V on pin 1 (RD/WH)
- Fan speed 2 should give a reading of 12 V on pin 2 (WH)
- Fan speed 3 should give a reading of 12 V on pin 4 (GN)
- Fan speed 4 should give a reading of 12 V on pin 3 (YE)
Also check whether the resistance across pin 5 and a good grounding point is < 0.1 ohm.
Try fitting a new fan resistor if all readings are correct.
5. Check the voltage on the following pins at the rear of the control panel's 8-pin connector. Readings should be taken with the fan connector unplugged and the control panel connector plugged in.
- Fan speed 1 should give a reading of 12 V on pin 1
- Fan speed 2 should give a reading of 12 V on pin 7
- Fan speed 3 should give a reading of 12 V on pin 6
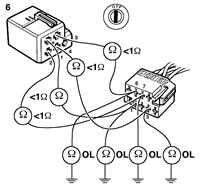
- Fan speed 4 should give a reading of 12 V on pin 3 Change the control panel if any reading is incorrect.
6. Check the leads for shorting/continuity if correct readings were obtained when carrying out point 5 but not when carrying out point 4.


