NG 900/9-3 Dashboard Insert Removal
Overview
Tools needed
- Torx screwdriver (part of the standard Saab toolkit)
- Two M4 screws
- DIN Radio Removal Tools
Time Taken
Approx 1 hour
Removal
1) Although it can be done without this, I would recommend removing the glove box and the panel underneath the steering wheel first as it makes the the job a whole lot easier as you can reach up behind the dash.

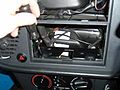
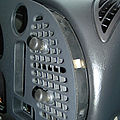
2) Using the DIN tools, remove the stereo head unit.
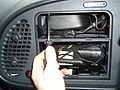
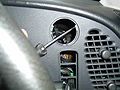
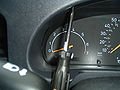
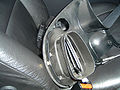
3) Screw the M4 screws into the two holes either side of the SID and withdraw the SID. Unplug the connectors.
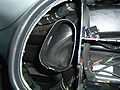
4) Gently prise up the tabs that secure the cage for the head unit and withdraw the cage.
5) Remove the 3 fixing screws that are now exposed.
Screw 1
Screw 2
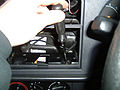
Screw 3


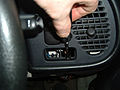
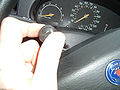
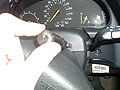
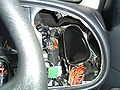
6) Reach up behind the dash and push out the headlight leveling switch (where fitted), both fog light switches, the intrument panel dimmer, the hazard warning light switch, any blanking plates, and the headlight switch. Disconnect the connector blocks and remove the switches from the dashboard. Disconnect the "Fasten Seat Belts" warning light by pulling the bulb holder c/w bulb out of the housing.
Note: all the switches are colour coded with their connector blocks so there is no need to label them.

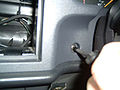
7) Remove the 2 fixing screws that are now exposed.
Screw 1
Screw 2


8) Remove the screws on the dash either side of the steering wheel.
Steering Wheel Left
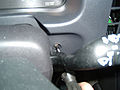
Steering Wheel Right


9) Remove the 2 screws at the top of the instrument cowl.
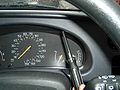
Instrument Cowl Screw 1
Instrument Cowl Screw 2


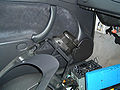
10) Remove the 3 screws that fix the steering column cowl and remove the two parts that make up the cowl. I have only pictured the 2 screws that fit the top section of the cowl here as I was in a hurry to get the work finished. Undo the screws and remove the top part (it is held together by tabs so it will offer some resistance) The other screw is in the centre below the steering wheel. Undo and remove the screw that fixes the lower section and remove the lower section of the cowl. It is also held in place by two tabs that fit over the the screw holes that the top section screws onto.
Steering Column Top Screw 1
Steering Column Top Screw 2


11) Extend the steering wheel out to its furthest point.
12) You can now begin to pull the dash insert out. All that is holding it in place are two spring clips either side and the air vents. Be careful with the air vents, they need to come out still attached to the dash. If they don't you have one hell of a fiddly job to try and put all the pieces that make them up back together again although instructions for rebuilding the air vents can be found here if the worst happens. Push the dash insert from behind and the vents should come out of the sockets that they slot into (be brave here...you will need to use some force!)
The clips
Air Vent Clip 1
Air Vent Clip 2


The sockets that the vents come out of
Left Vent Socket
Right Vent Socket


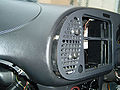
The dash out with the vents in place
Dashboard Insert
Dashboard Insert


Replacement
On this occasion, refitting really is the reverse of removal. The application of some washing up liquid to the leading edge of thre air vent assembly can make it much easier to refit.